Showing posts with label Pattern. Show all posts

Sunday, September 10, 2017

Dots and Colored Stripes

With International Dot Day coming up this week I thought it might be fun for students to experiment with color and 3 different media choices.


Years ago a parent gave me a large collection of buttons that I still have not exhausted, even though I have used them to start several art projects. I thought they could be the starting dot.


To introduce the stripes, David Shannon's A Bad Case of Stripes provides the perfect springboard to discuss color theory (whatever aspect is appropriate to the grade level, i.e. warm/cool, complementary,  primary/secondary/tertiary, tints/shades, etc.). This book also is about not letting others influence your choices and being true to yourself, also a nice trait to relate to art.


,

The project is for each student to start with a 6" X 6" board (or paper) with a button "dot" glued near the center. The student then makes concentric circle stripes around the dot using one of 3 media: watercolor marker painted over with clear water, water soluble wax pastels colored pencils painted over with water, or plain watercolor. Of course, you could use whatever media you like. I chose these because they allowed me to teach primary students how to use a paintbrush correctly with attention to direction of line when using it. Lessons here, and here. I like for kids to experiment to find colors they like to have next to each other.

           Watercolor Marker (Crayola) painted over with water.


             Water soluble Wax Pastels painted over with water.


              Pan Watercolors
              For this version I like to require students to use the lid of 
              their pan to mix new colors to use.

Just imagine a whole bulletin board of these displayed as a collaborative work!!!!  Happy Dot Day everyone (this Friday)!

Thursday, August 11, 2016

Art Audition - Footprints in the Sand (or Tea Bag Art)

I think one of the most fun parts of teaching anything (but art in particular) is trying out new ideas with students and seeing the results. For me, these don't have to be original ideas (but it's fun when they are) just new to me or the first time I have tried them with kids. And I ALWAYS want to "audition" them first at home before introducing them to the classroom. It seems that this is the time of year (2 weeks before school starts) when a lot of these ideas start percolating. I thought it would be fun this year to share with you some of these "art auditions!"

Here we go with the first one:
Footprints in the Sand or Tea Bag Art!!

Last January, following joint replacement surgery, I was told to walk EVERY day, and I have been pretty consistent in following through. While walking in my local park, on the sand and gravel pathway, I noticed the variety of footprints imprinted in the path and thought, "Wouldn't kids have fun with this!"

Step one is to create the sand. Great use for all those used teabags after making ice tea!! Coffee would work, too. Pressing lightly on the bag creates a light beige, leaving the bag a few seconds before lifting up results in a darker tone. Good time to talk about value.


Overlapping the tea bag prints is pretty important for an over all sandy look.

I didn't even wait for the background to dry before printing the soles of a few shoes. In the classroom, kids can trade shoes to make a variety of sole designs. I used pastels that I dragged across the sole and then just printed it on the damp background. If you want to get a little messier you could try this with paint!! I didn't think I wanted to try cleaning paint out of all the grooves, though. **Have plenty of water and paper towels for kids to clean their shoes after printing.


For younger students I would probably stop after they had covered their "sand" with footprints. Older kids could use black Sharpies to outline the patterns on the shoes, as in the example below.
In my last post I had this photo of a local mural where a boy is looking towards the beach through his binoculars. 

I think I would probably have kids discuss this mural, which is on a wall that is walking distance from school, as well as Dr. Seuss', Oh the Places You'll Go! , as a part of this lesson.

Sounds like fun, huh??!!
Hope you are all having fun thinking about getting back into the swing of things!!

Saturday, November 14, 2015

More Picasso Fractured Faces for Winter

After we did our Frankenstein lesson (see here) I started thinking of other options for this lesson. I did a quick Google search for Picasso Snowmen and found some full body examples, but no portraits. Thinking that kids would have fun with that variation I gave it a try. 

Instead of cutting out the face, I tried painting the 2 halves, shading for a bit of dimension. The background is pastel in the complementary color to the blue in the face. The pastels could be left like this, or smoothed over with a bit of paper towel for a blended look.


All the details were drawn on a separate piece of paper and colored with marker or crayon.


The last step is to cut them out, arrange them in a fractured (or Cubist) form and glue.


I like the idea of backing the whole piece in a color to complement the colors used in the collage/drawing.


The whole purpose of this exercise was to play around with breaking apart faces/profiles and gaining some understanding of what Picasso was experimenting with. I guess you can see that the possibilities are unlimited. I hope some of you give it a try with your students trying some other options!!

Sunday, October 25, 2015

Papier Mache Leaf Displays - 3 Variations

Remember the papier mache leaves we made the last 2 sessions??
The 3 below were painted using the paintings of Kim MacConnel as inspiration. You can see his work here. I love his abstracts for their colors and patterns!! You can find Parts 1 and 2 of this lesson here and here.


Well, here is Part 3, with 3 ways to display the leaves.

Our first variation is to create sculpture with the leaves. Glue All and clothespins to hold the leaves will work, but a parent or teacher manning hot glue guns at a station for kids to rotate through is faster if you have the man-power. I suppose older kids could be trusted with this step, but it always makes me nervous to put hot glue guns in the hands of children in a classroom.

These are mounted on black illustration board.

Combining the leaves gives students an opportunity to experiment with  "form"

Option #2 is mounting the leaves flat on illustration board (or cardstock) with at least one edge outside the boundary. This provides an opportunity to discuss positive and negative space.


Display Option #3 is to make a mobile. These were hard to photograph showing the dimension, but I think you can get the idea. You can see the hole punched in the leaf with an awl (a metal skewers, too). The leaves are hung with fine monofilament fishing line so it looks like they are falling. One of our science units is "Balance and Motion" and these mobiles give students practice in getting their leaves to balance.


Here are the "MacConnel" leaves hanging from a twig. We have lots of trees with fallen twigs around school, so it is easy to have students go out and find a suitable ones.
This Mondrian inspired mobile is hanging from a small portion cup with 4 holes punched at "12 o'clock, 3 o'clock, 6 o'clock and 9 o'clock. Again, fishing line is tied on the line and in the punched holes in the cup. You can see the close up below.


This last example is a combinaton of sponge painted leaves and leaves painted with colors to match famous artists' works.

Most of these leaves were painted with acrylic so they have some shine. If you use a more matte finish, you might spray the leaves with a shiny glaze before the final assembly.

My original thought was to do class mobiles -- large affairs with kids hanging their all their leaves from one large branch -- but that's not going to happen this hear.
Happy papier macheing!!!

Thursday, May 14, 2015

Lots of Dots in Kindergarten

Here are some lovely little kindergarten paintings drying. They will soon be tucked away until their big August reveal!!

At the same time as this painting is going on,  I am also starting to box up supplies to get ready for the school's BIG summer cleaning. We have new protocols this year that call for packing up anything not stored in a closed cupboard. It will be nice to have everything really clean, but right now it feels like getting ready to move!!! That is a whole story unto itself!


Meanwhile, in planning for an art display in our Auditorium to kick off the 2015-16 school year, Kindergarteners are painting lots of dots:)) This is so we'll be ready to celebrate International Dot Day (Sept. 15th), based on Peter H. Reynolds' book, The Dot.

I have done lessons like this before with 4th graders (with a little more color wheel art content included). You can check that out HERE. I originally found out about Dot Day from Hope Hunter Knight's blog back in 2012  -- thank you, Hope!!. You can find a link to her dot lesson through the above link. 


This week I started talking a bit with kindergarteners about the book and how Vashti started by just making a mark and then her art grew and grew.

We took a look at some different kinds of lines that markers can make and gave the lines names. Some of the kids' names were:
        "Curly-Q"
        " Wavy"
        "Mountain tops"
        "Train-tracks" . . .   You get the idea:)


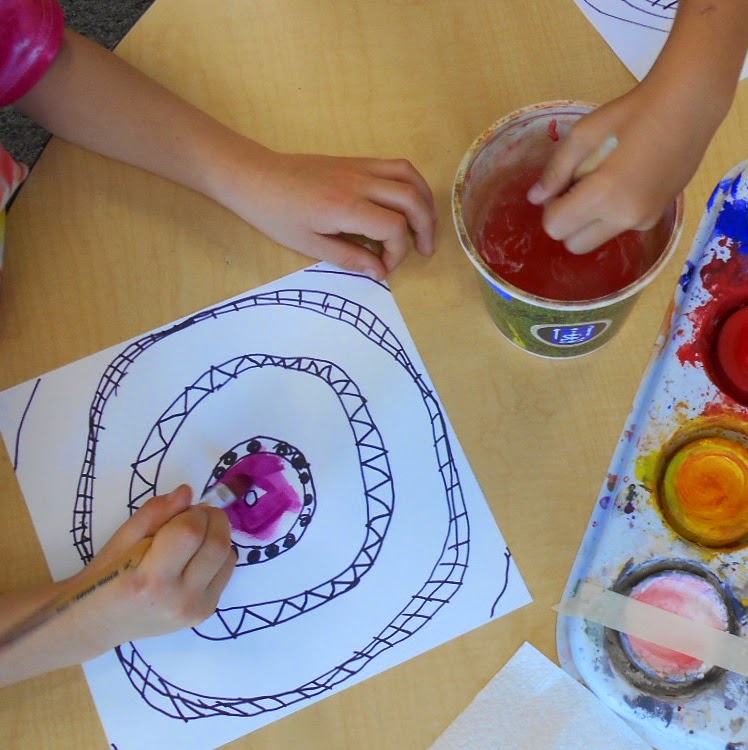
Using a black permanent Sharpie I demonstrated how to make concentric circles, one a "skinny pathway" and the next a larger space for painting. Students followed along.

Then they either used line patterns from our chart or made up their own lines to fill their "skinny pathways."

I had them come back to the rug to talk about using "Mr. Brush" so that our brushes would last a long time. I share with them that I have one set of watercolor brushes that have been used at our school for over 50 years -- TRUE STORY!!


I showed them how to clean their brushes between changing colors and test to see if they are clean by running the brush along the top of their hand to see if the water is clear.


Then it was back to their table to paint all the large circles between the black and white pathways.


Love the asymmetry of the middle piece!!

The girl on the left spent a lot of time mixing the colors in the lower left part of her work using her finger.

This little guy didn't quite get the idea of leaving alternate areas blank for the paint and filled them all with patterns. He was so intent on what he was doing I didn't have the heart to stop him!!

Of course, you'll have to check back in August to see all our dots displayed. By then all these boxes I am packing now will be unpacked and we'll all be ready for a brand new school year!!

Wednesday, February 4, 2015

Patterned Columns a la Siena Cathedral

Every now and then Pinterest provides a wonderful "find." That's how I felt when I stumbled upon a zentangle blog (here) that took its inspiration from the columns inside the wonderful Siena Cathedral. There are some great images of the cathedral's interior on Google.
The site teaches how to get the 3-D look, as well as how to "wrap" the design with a frame. What a great way to reinforce repetition, pattern, line direction (vertical, horizontal, parallel) and shading!!!

Since the only materials needed are a fine line marker, pencil, ruler and paper or board, it is great lesson to leave for a sub when you are going to be out of your class, too!


4th graders started by drawing their frame. Next they drew vertical pairs of lines to mimic the columns. These can be parallel, that is not necessary. Single vertical lines can be used to create a zig-zag effect. The next step was to draw horizontal bands that they would fill with patterns. ** Some students needed help seeing the arc lines connecting the verticals:))


 Then they created border designs that wrapped around their piece. The last step was to shade one side of the columns or zig-zag and shade the interior side of their frame border to add depth.
Here are few that are almost finished.


Monday, October 13, 2014

Overlapping Quadrilaterals (and other shapes!)

I love listening to children using academic language, and especially when that vocabulary comes from multiple disciplines. With that in mind,  I wanted these 4th grade students to work with shapes they had learned in math, and apply their knowledge in Art.
We started with a Hang Spider game where the missing word was "quadrilateral", a word from last year's state math test. I wanted to recirculate some shape vocabulary.
I demonstrated how to draw and cut some of these shapes. Students' goal was to aim for quadrilaterals, but if they ended up with other shapes, that was fine, too. We got quite a variety!!
 The first step was to fold a piece of cardstock (6" X 9") in half. They tried to visualize what the final shape would be if they drew half of it from the fold. They drew the outside lines of their shape, beginning and ending on the fold. Then they drew the inside lines of the shape and . . .
 cut on all their pencil lines. I had a few extra papers so kids could experiment.
When they had cut out a minimum of three shapes, it was time to use crayons to color patterns or designs on them.
I set a couple of parameters for the coloring phase: 1 shape had to be black and white, 1 shape had to be made of 2 complementary colors (opposites on the color wheel) and other shapes could be anything the artist liked.

When it came to gluing, which was done with Elmer's Glue All (my favorite glue) in 4 oz. bottles, I asked students to make sure that their shapes either overlapped (creating black negative spaces) or touched another shape. Our back ground was an 8 1/2 " X 11" piece of black card stock. This was another opportunity to get "good" at making little dots of glue!!!!

 Most students were very thoughtful as they decided on their composition. Part of my lesson was to emphasize negative space, angles, borders and color placement.

Here are some of our results:
 I told the boy who made the above piece that it reminded me a bit of the front of a car (the grill area). He, of course, thought that was pretty cool!

 The above piece got more and more intricate as he played around with his shapes. It was interesting to see how many children opted for symmetry.
 I had mentioned that going "off the page" was totally fine, but not too many students made that choice. This girl planned her black and white quadrilateral with that intention in mind because she colored the back of that piece with black and white stripes so that it would look planned from the back!!

Another option for this lesson is to make it sculptural. I had intended to try it out with classes but did not have the opportunity. To exercise this option, cut a strip of black card stock to glue standing up on the 9" X 12" card stock. Students color BOTH sides of their shapes and glue them (still overlapping) on the black strip.

I am hoping that these children go home and experiment with other shapes and compositions. Since it requires no special media, it might happen:)))