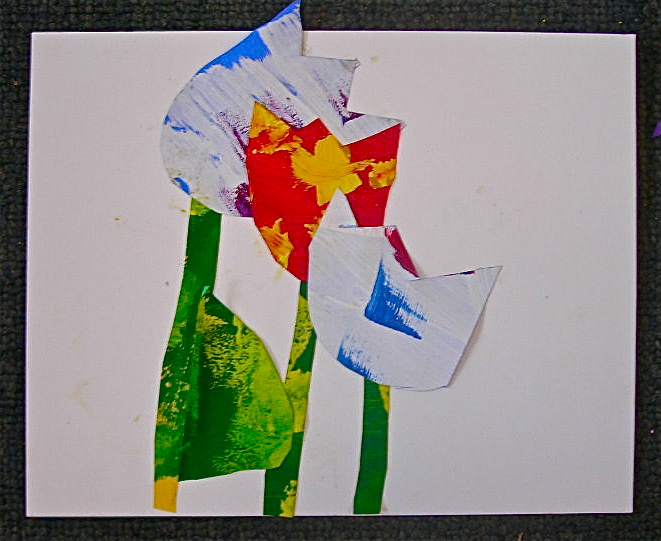
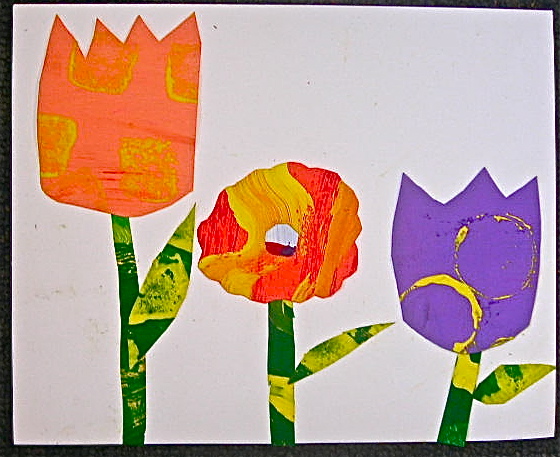
Using the colorful painted papers that they made last week (HERE), kindergarteners cut and glued their own garden collage patterned after Lois Ehlert's Planting a Rainbow.

The table set-up had all the colored papers (I cut them down to an appropriate size) sorted into flower colors and stem/leaf colors, glue cups, scissors, etc. I asked that they start with one long, one medium and one short stem. The long stem was pre-cut and waiting on their board and I taught how to use 3 (that is THREE) dots of glue on each stem, one dot at the top, one in the middle and one at the end. We kept reiterating, "A DOT IS A LOT" so students would not spread the glue like peanut butter on a sandwich!!!
 |
| I gotta say, the colored papers started out nice and neat like this, but by the time the sixth class arrived we had QUITE an assortment of scraps. I kept adding more "whole rectangles" to the pile and we had plenty of paper to complete the project with left-overs for another time!! |


I also demonstrated cutting a circle, trying to stay near the edge of the paper so that the circle wouldn't end up too small!! For the basic leaf shape, I modeled cutting a curve up from the mid-point of the bottom to the mid-point of the top of the rectangle and then doing the same on the other side. However, once kids had scraps, they were encouraged to design their own leaf shapes.

No pencils were used during the cutting process, so the result were some pretty creative flowers!!

 |
| Color choice and composition was left up to the kids to decide. The only thing I asked was that they try to glue their stems even with the bottom of the paper so we didn't have "floating flowers." Most were successful with that. |

This was a great opportunity to circulate and help kids with cutting skills. Once before I posted about the use of scissors (HERE) and I REALLY saw a variety of ways that kids can hold scissors during this lesson. Probably the most creative was the child who had the scissors turned toward herself and was cutting top to bottom!!

The saddest part of this project is that I have to give all this art back to the students!! I could take any of these home to hang on my wall!! The best part was that the kids didn't want to stop creating!!


Kids who finished early cut flowers for a larger mural that we will be hanging in the hallway and leaving up to welcome students back in the Fall. As soon as I get it up, I will show you that, too!!
Have a great week at school!
Well done Kindergarten!!! Just beautiful! Maybe you can get a couple of the kids to cut out and create one just for you to hang in the art room? :)
ReplyDeleteEXCELLENT idea!!!!!
DeleteAmazing colorful results.
ReplyDeleteI love them all.
How vibrant! These are absolutely beautiful and all so unique.
ReplyDeleteWoow! Very nice and creative piece of craft! I wonder if my child can do that already.
ReplyDeleteThey look terrific! I'm a big fan of cutting without pre-drawing. I like the plain white background, with nothing to distract from the flowers.
ReplyDeleteThose are absolutely beautiful! What a great art lesson for the kids. I'm going to pin this one!
ReplyDeleteBeautiful Spring lesson- thanks for sharing all the tips and tricks!
ReplyDelete