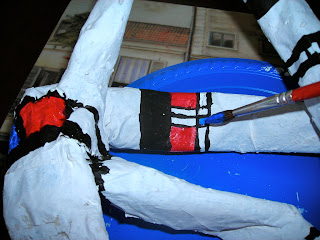
The supplies are minimal, 2 sheets of newspaper for each "ring, newspaper strips, paper mache paste (I used a mixture of flour and water because it's inexpensive and works just fine), gesso and acrylic paint.
First, I rolled 2 sheets of newspaper diagonally and tucked the ends together to form a ring. I made 2 rings, bent them into interesting forms and paper mached them. Once they were each covered with wet strips, I laid one on top of the other and paper mached the "joints" so the two would dry stuck together.
 |
| I always have kids paper mache on a plastic plate or a meat tray because it makes storing and carrying easier. |
When the structure was dry, I painted it with white gesso.
When the gesso layer had dried, using images of Mondrian's Compositions and Frank Lloyd Wright's window designs, I painted the black lines.
The last step was to add small blocks of primary colors to some of the areas created by the black lines, leaving most of the sculpture white. Voila!!
This is a great project for kids to do at home!!! It provides opportunities to discuss color(primary colors and balance of color), line, shape, form, balance and repetition.


This is a very creative way to introduce Mondrian's art.
ReplyDeleteThanks for the tutorial.