Showing posts with label Watercolor markers. Show all posts

Sunday, September 18, 2016

A Pathway of Dots

After reading Peter Reynold's book, The Dot, last week 3rd graders designed dots in a segment that was to become a larger, collaborative "pathway of dots."

 They used a color system of cool colors to create the path and warm colors with a cool center to design their dots. The actual lesson can be found here. The only addition I made to that lesson was to have students use their 4 fingers (not including their thumb) to measure the width of their pathway. That gives the path continuity when putting the segments together.


Kids LOVE seeing how the segments can be attached in different ways! This is fun for them to do on the rug in groups before it actually goes up on the wall!!

Saturday, December 5, 2015

Winter Reflection Collage

Every now and then I resurrect a reflection lesson (see here) with a different theme. Last year it was with pumpkins in a puddle (here) for fall, this year it is with snowmen in the forest with the addition of collaged ice skaters on the pond.

We start by folding the paper in half (lengthwise) and use landscape setting. I use regular copy paper from the printer rather than heavier drawing paper. Kids draw their forest scene with snowmen using Crayola Watercolor markers (they seem to work the best for me). You can find some great Google images of forests, mountains, etc. to show your class for reference. Caution students to draw their trees and snowmen sitting right on the fold line. This is REALLY important!!


Then spray or brush water on the white part of the paper and carefully fold it up onto the colored part. Press lightly and unfold to see the reflection on the pond.


You could stop right there and call it a day. Because these are on copier paper, they dry REALLY quickly.

Or, if you have the time, have student draw and color ice skaters that they can cut out and glue onto the ice. We used drawing paper (90# I think) for this step. (We do quick gesture sketches on scratch paper to get the positions to show movement.) This is a good opportunity to mention creating the illusion of depth  with overlapping and size of objects!


In the example below, the student took time to go back after the paper was dry and before gluing the skaters to add extra touches of color to the forest using oil pastels.
She also spattered white paint for that snowy touch.


This is a pretty quick, fun project for that wintery feeling!!

P.S. - Blogger's new feature of allowing you drag and drop pictures right onto your post is VERY cool. Thank you Blogger!!

Tuesday, June 23, 2015

It Started With Foam Core

Once upon a time an art teacher had a bunch of left over foam core (yes, that would be me:)). What to do with it?? How about some simple sculptures with a little design thrown in. That is how this all started. All well and fine, but I didn't like it and decided not to use it with kids. That seems to happen a lot when I'm trying to design lessons that will teach something of substance. So I set it aside.


One night I was looking over at it and noticed the shadows created by the raised edges and decided to do a quick sketch.


That made me think of when little kids draw things like tables they often draw the 2 front legs vertically and the back 2 legs protruding out diagonally (instead of leaving them out altogether or just drawing the part they can actually see). I'm not talking about an intentionally abstract rendition, but when kids are trying to represent something realistically and then get frustrated when their drawing doesn't "look real" to them or match what they see. Here we are at the crux of the matter -- what are you really seeing vs. what you think you see. I think little exercises in seeing are FUN and sometimes produce little exploratory gems.

So, curious about how washable watercolor marker shadows would look, using a black Crayola marker, I drew some shadows.


Then, I painted the marker lightly with plain water. (Now, this I like!!)


That was pretty fun!! But, it got me thinking about Holton Rower's drip paintings on plywood art. They truly fascinate me!! 

If you haven't seen this video of the process, it is a good one to check out (HERE).

Anyway, that got me experimenting drawing boxes with dripping paint. Hmm. Drawing the paint dripping is harder than it looks. This would really get kids to focus on changing line direction as the paint moves from a horizontal plane to a vertical drop!!!

This could tie into a Geometry unit. 
A little shading might be a good idea, too.

I think this would be fun to do with older kids.

The final question that came to mind was, "What would it look like to draw a tower looking at it from above?" Instead of using regular blocks, I tried it with organic shapes, using the same watercolor marker and water brushstrokes technique to create the shadows.


Younger students could have a blast with this!!

And just think, all this started with a bunch of left over foam core (which, it seems, I still haven't figured out what to do with)!!!

Hope everyone is enjoying a relaxing summer!

Friday, May 8, 2015

Kindergarteners and Kandinsky

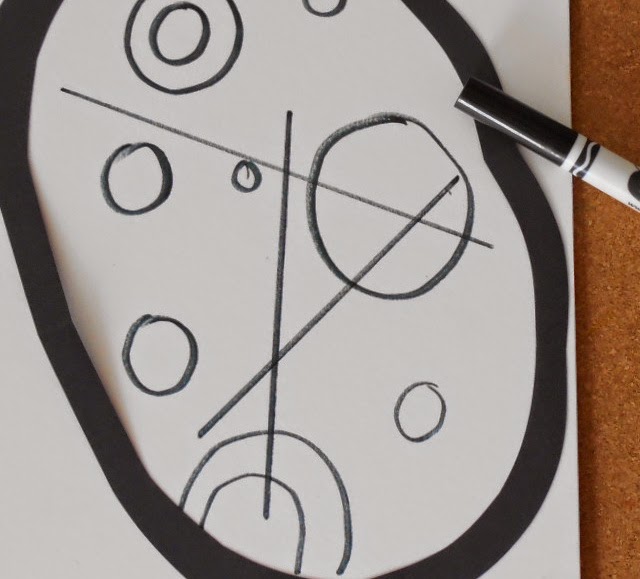
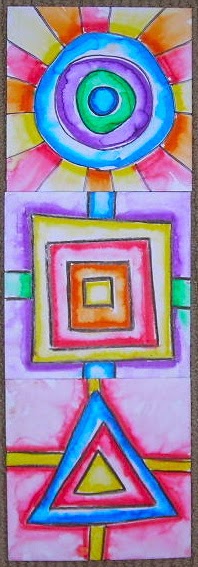
Earlier this year our Kindergarteners made their own renditions of Kandinsky's Squares and Concentric Circles -- you know, the one we all try with kids sooner or later. Well, this week we are taking a look at another Kandinsky work, Circles in a Circle. Here are a few of ours drying in the sun.

And here is a sort of grainy shot of the Kandinsky from the Smartboard. Sorry for the quality of my picture:(
We talked about how many circles we saw, how many lines, size and colors of circles, directions of lines, etc.

Then the fun began. I had prepared part of the large circle with a crayon line for kids to cut to finish it up. I wanted them to practice cutting, but, from experience,  I knew doing the whole drawing and cutting on the fold thing might be too much for the time we had allotted.  They glued their circle on their boards (9" X 12" illustration board - but paper would be fine, too).


I know, this isn't a circle. It was my first sample and it's an oval -- that works, too!!


To decide how many circles to draw inside, we rolled dice at each work table (and drew that many with washable markers - I like Crayola brand markers for this) -- some large, some small, some within other circles - all drawn freehand. I heard LOTS of counting and comparing going on during this part of the lesson!! Using primary colored crayons, kids colored a few circles. Then they drew some straight lines - also with washable marker.


Finally, out came the paint brushes and students gently painted plain water over their marker lines to blur them and get a "painterly" look.


So, what skills did these little ones practice: cutting, gluing (a dot is a lot), drawing (shape, line), color choice and placement (balance, repetition), using a straight edge, use of a paintbrush (we still have a ways to go before we get that all right!!).

Saturday, November 22, 2014

A Few Pumpkin Results for Thanksgiving Week

A few weeks ago I posted a lesson titled "Pumpkins in Puddles" where students used watercolor markers and plain water to make reflection drawings. (click here for steps)

When I did the actual lesson in class, I had this assortment of squash and gourds for kids to see and touch. I also had this photo displayed on the Smartboard so that everyone had a good view.


I asked them to imagine any of these outside on the ground after a rainstorm, when the sun came out. What would they see? -- A reflection, of course. 

Students drew their pumpkins, etc. on a fold line in the center of their paper (just regular copier paper) using Crayola watercolor markers (Classic set). I emphasized shading and leaving white highlights where the light hit the top of each squash. Then they brushed water on the bottom of the paper, folded the dry half onto the wet half, pressed thoroughly and VOILA!! Reflections everywhere!!


As you can see, we talked about overlapping, shadows and blending colors. I also mentioned that their final results would look different once they added the water and that it was a bit of an experiment in that sense.


Happy Thanksgiving!!

Saturday, October 18, 2014

Pumpkins in Puddles

Around this time of year I ALWAYS have a yearning to draw pumpkins, or to teach kids to draw pumpkins. However, because of parent conferences and Halloween scheduling I almost never am working with students these last weeks of October. So we will probably get around to this lesson next month as an Autumn theme art project, but I just can't wait until then to post it here because it's really fun to do and would be great for Halloween!

We'll start with drawing step-by-step pumpkins.  I use regular copier paper for this. First, you fold it in half. Students draw their pumpkins on the fold, leaving the bottom of the paper blank. I have to make a run to Target tomorrow to stock up on Crayola Classic Watercolor Markers -- the best I've found for this reflection technique. (See a previous post using markers and water to create reflection in a city scene by clicking HERE.)

 Notice that we draw with a darker color first, brown or purple works well. This creates the look of depth in the creases of the pumpkin.
 When coloring in with the orange it is important to leave spaces white where the highlights would be. I usually bring a flashlight and a pumpkin to school so that kids can actually see how the light source creates that highlight. It also helps to add darker color shading on the underside of the pumpkins. We often add a few tendrils as a last step.
When their drawings are done, students paint plain water (lightly) on the bottom half of the drawing and fold it up onto the drawing. They press the entire area and then pull up to reveal the reflection.

All of this can be completed in one 45-minute session. However, if you would like to go a step further, when the print dries, kids can add crayon details for the straw the pumpkins are sitting on, extra shading on the pumpkins, etc. The first example at the start of this posting has that and some pencil details to delineate the puddle effect.

There, now I have satisfied my yearning for pumpkin drawing. When we finally get around to doing this little project in class, I'll be sure to post student results:))
Happy Halloween, everyone:))

Saturday, May 10, 2014

Collaborative Shapes

Well, all right, the shapes may not have been collaborative, but putting them together was. As kindergarteners finished their contour shapes, they matched them up with their classmates' shapes on the drying racks.

Students, using my favorite Stayonal crayons, drew a small shape in the center of their board. We were using 6" X 6" squares. They measured one finger width from their first shape and drew another shaped around the first one. They continued doing this, pressing very hard with their crayon, until they got close to (but not touching) the edges of the board. They added little "roadways" at the midway point of each side running off the board. These were so we could connect the squares later.

Then it was time to add color. Students used any colors they wanted (although we had reviewed primary and secondary colors before starting) and drew a "fat line" right next to each of their crayon lines. Then they brushed clear water over their marker line and watched the color "travel" into and on the water. Some said, "It's like magic!" They learned that it was important to load the brush with water.


Part of the focus of this lesson was to provide practice tilting the marker at the right angle to get a thick, rather than thin, line of color.


Another focus was on how to use a water color brush keeping the bristles smooth, cleaning it with water and laying it on the table (or a tray) when not being used instead of leaving it sitting upright in the water container. I used my Mr. Brush chart before we started to reinforce these brush rules.

I heard a lot of conversation when 2 or even 3 colors ran together creating a new color. This was good reinforcement for last week's lesson where kids mixed primary colors to make secondaries.


Here is what a whole class collection looks like:

Thursday, May 1, 2014

Kindergarten Fireworks

With Memorial Day and then the 4th of July coming up, kindergarteners started thinking about fireworks today. The fact that it was 90+ degrees here at the beach today helped us think about summer!!

I projected images of various fireworks paintings that I found in a Google search on the Smartboard for students to compare and discuss. We particularly focused on the direction of the lines. Then, using Ellen Stoll Walsh's Mouse Paint, we reviewed what colors can be mixed using primary colors. And then the fun began:

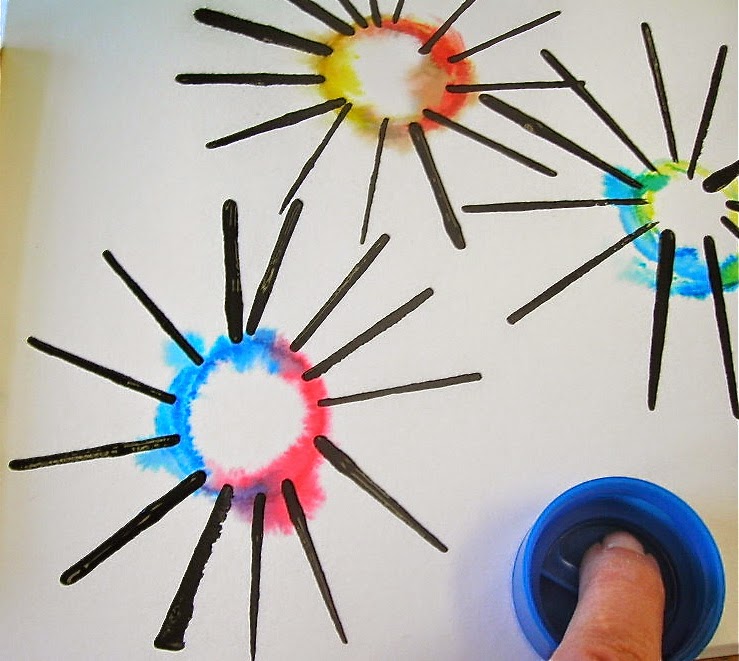
First, using washable Crayola markers, students colored half of a lid in one color and the other half in another color.
Then they brushed plain water on the area of the board they were planning to print and twisted the lid as the firmly pressed it onto the board. It was important to use plenty of water on this very warm day!!
 I asked kids to predict what their "mixed" color would be. They were delighted to see how the marker turned to paint and ran every which way on their board!!
When everyone had printed 3, 4 or 5 circles, I demonstrated how to dip a piece of board into black tempera and print the "rays" around their fireworks.


 Some lines would "bump into" other lines -- that was great. Some lines would "go off" the page -- also great. It was fun watching kids plan the placement of their lines.
This is one of those lessons that is "just right" developmentally for kindergarteners to play around with. We heard a LOT of "Oh, look, I made orange!!" and "It's purple -- look at how it is running into the water!!" and "It's just like exploding fireworks!! -- When will I get this back??" The paintings came to life with the addition of the black!
When they are dry I'll post some of the results.

We didn't have time to extend this lesson today, but adding a building or 2 to the composition would be fun -- maybe talking about artist James Rizzi.
This building is painted foam core with cut construction paper windows.