Showing posts with label Line. Show all posts

Sunday, September 10, 2017

Dots and Colored Stripes

With International Dot Day coming up this week I thought it might be fun for students to experiment with color and 3 different media choices.


Years ago a parent gave me a large collection of buttons that I still have not exhausted, even though I have used them to start several art projects. I thought they could be the starting dot.


To introduce the stripes, David Shannon's A Bad Case of Stripes provides the perfect springboard to discuss color theory (whatever aspect is appropriate to the grade level, i.e. warm/cool, complementary,  primary/secondary/tertiary, tints/shades, etc.). This book also is about not letting others influence your choices and being true to yourself, also a nice trait to relate to art.


,

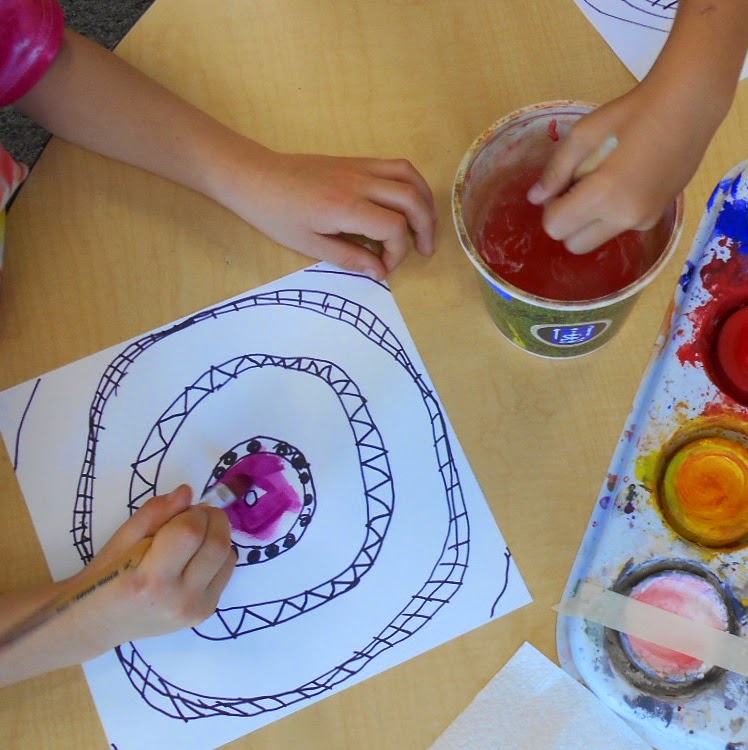
The project is for each student to start with a 6" X 6" board (or paper) with a button "dot" glued near the center. The student then makes concentric circle stripes around the dot using one of 3 media: watercolor marker painted over with clear water, water soluble wax pastels colored pencils painted over with water, or plain watercolor. Of course, you could use whatever media you like. I chose these because they allowed me to teach primary students how to use a paintbrush correctly with attention to direction of line when using it. Lessons here, and here. I like for kids to experiment to find colors they like to have next to each other.

           Watercolor Marker (Crayola) painted over with water.


             Water soluble Wax Pastels painted over with water.


              Pan Watercolors
              For this version I like to require students to use the lid of 
              their pan to mix new colors to use.

Just imagine a whole bulletin board of these displayed as a collaborative work!!!!  Happy Dot Day everyone (this Friday)!

Saturday, June 3, 2017

Mini Camouflage Abstracts

Our last project of the year was this little camouflage abstract. 


I say camouflage because each little painting started with a cut-out from a cereal box or catalogue that was glued in the center of the 6" square illustration board. I had a lot of precut recycled cut-outs so kids had quite an assortment to choose from. I tried to have some with several colors and some with only 2 or 3 for kids who wanted something easier.


Then, using Sharpie pens, the kids extended lines from the cut-out to the edge of the board wherever two colors met. You can see what I mean in the above photo. Where the red changes to white, that is the start of one Sharpie line. Kids just moved their finger around the edge of the cut-out, looking for where one color met another.
I also made the rule that one Sharpie line could not cross another.


Then students used water color to try to mix the exact color on the cut-out and extend that color out to the edges of their board. I also said they, as artists, might choose to leave some sections white.


You can see in the first painting in the above photo how this student worked to achieve the variations of blue. These were done by 2nd graders and the concept of making tints using more water instead of adding white was a new skill for many!!


I love the graphic variety in these little gems!! I also told the kids that one of the reasons we were doing them now, was to remind them that they could easily do pictures like these at home during the summer using recycled cut-outs to start them out.

This is one of those absolutely "no fail" projects where everyone is successful. I think they did a GREAT job -- as I look at the photos above I am having a hard time finding some of the camouflaged shapes and I know where they are!!!!

Happy Summer!!


Sunday, May 29, 2016

Stars and Stripes 2016

Whether it is Memorial Day, Veteran's Day or the 4th of July, it is fun to  celebrate the red, white and blue. This is a quick project requiring pastels, paper, paint and a few pieces of cardboard.

Artists use one triangle and chalk to create a five-pointed star. This is good for talk about, not only how you go about positioning the triangle five times to create the star, but also for the starting point of the chalk marks (on the triangle, brushing out) and conversation about the direction you "swipe" the chalk (from the triangle straight out as you work your way around the point of the triangle). It is a good idea to practice this on newspaper first! If you think the triangle method is too hard for you group, this can be done with a full star pattern instead.

After making the initial chalk mark, students swipe the mark again with their finger, smearing the chalk outward, so the star looks like it is shining.
Once the stars are done (I like the kids to make various sizes using small and large triangles), it is time for some stripes.

These were done by dipping the edge of a piece of cardboard (we use scraps of illustration board) in tempera (acrylic works, too) and "printing the stripes". I emphasize, "straight down, straight up" to avoid sideways smears!!


 You can decide whether to have your kids stick with vertical/horizontal stripes like the one above, or let them print however they like, as in the example below.

The motivation for all of this was our local National Veteran's Cemetery (seen across the street from the Federal Building), which is adorned right now with thousands of American flags at the gravesites and along the inner roads. I love driving by this time of year. Hope you all have a meaningful holiday as summer nears!


Thursday, May 14, 2015

Lots of Dots in Kindergarten

Here are some lovely little kindergarten paintings drying. They will soon be tucked away until their big August reveal!!

At the same time as this painting is going on,  I am also starting to box up supplies to get ready for the school's BIG summer cleaning. We have new protocols this year that call for packing up anything not stored in a closed cupboard. It will be nice to have everything really clean, but right now it feels like getting ready to move!!! That is a whole story unto itself!


Meanwhile, in planning for an art display in our Auditorium to kick off the 2015-16 school year, Kindergarteners are painting lots of dots:)) This is so we'll be ready to celebrate International Dot Day (Sept. 15th), based on Peter H. Reynolds' book, The Dot.

I have done lessons like this before with 4th graders (with a little more color wheel art content included). You can check that out HERE. I originally found out about Dot Day from Hope Hunter Knight's blog back in 2012  -- thank you, Hope!!. You can find a link to her dot lesson through the above link. 


This week I started talking a bit with kindergarteners about the book and how Vashti started by just making a mark and then her art grew and grew.

We took a look at some different kinds of lines that markers can make and gave the lines names. Some of the kids' names were:
        "Curly-Q"
        " Wavy"
        "Mountain tops"
        "Train-tracks" . . .   You get the idea:)


Using a black permanent Sharpie I demonstrated how to make concentric circles, one a "skinny pathway" and the next a larger space for painting. Students followed along.

Then they either used line patterns from our chart or made up their own lines to fill their "skinny pathways."

I had them come back to the rug to talk about using "Mr. Brush" so that our brushes would last a long time. I share with them that I have one set of watercolor brushes that have been used at our school for over 50 years -- TRUE STORY!!


I showed them how to clean their brushes between changing colors and test to see if they are clean by running the brush along the top of their hand to see if the water is clear.


Then it was back to their table to paint all the large circles between the black and white pathways.


Love the asymmetry of the middle piece!!

The girl on the left spent a lot of time mixing the colors in the lower left part of her work using her finger.

This little guy didn't quite get the idea of leaving alternate areas blank for the paint and filled them all with patterns. He was so intent on what he was doing I didn't have the heart to stop him!!

Of course, you'll have to check back in August to see all our dots displayed. By then all these boxes I am packing now will be unpacked and we'll all be ready for a brand new school year!!

Friday, May 8, 2015

Kindergarteners and Kandinsky

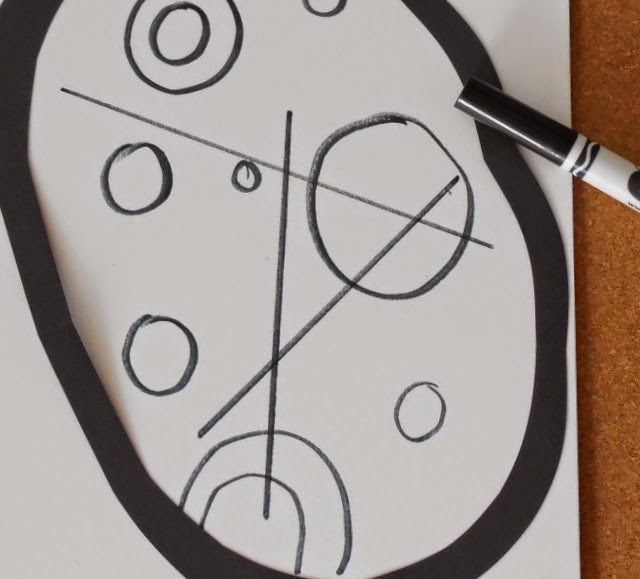
Earlier this year our Kindergarteners made their own renditions of Kandinsky's Squares and Concentric Circles -- you know, the one we all try with kids sooner or later. Well, this week we are taking a look at another Kandinsky work, Circles in a Circle. Here are a few of ours drying in the sun.

And here is a sort of grainy shot of the Kandinsky from the Smartboard. Sorry for the quality of my picture:(
We talked about how many circles we saw, how many lines, size and colors of circles, directions of lines, etc.

Then the fun began. I had prepared part of the large circle with a crayon line for kids to cut to finish it up. I wanted them to practice cutting, but, from experience,  I knew doing the whole drawing and cutting on the fold thing might be too much for the time we had allotted.  They glued their circle on their boards (9" X 12" illustration board - but paper would be fine, too).


I know, this isn't a circle. It was my first sample and it's an oval -- that works, too!!


To decide how many circles to draw inside, we rolled dice at each work table (and drew that many with washable markers - I like Crayola brand markers for this) -- some large, some small, some within other circles - all drawn freehand. I heard LOTS of counting and comparing going on during this part of the lesson!! Using primary colored crayons, kids colored a few circles. Then they drew some straight lines - also with washable marker.


Finally, out came the paint brushes and students gently painted plain water over their marker lines to blur them and get a "painterly" look.


So, what skills did these little ones practice: cutting, gluing (a dot is a lot), drawing (shape, line), color choice and placement (balance, repetition), using a straight edge, use of a paintbrush (we still have a ways to go before we get that all right!!).

Monday, March 30, 2015

Lines in a Ring

 Taking our cue from Kandinsky's "Circles in a Circle", first graders created "Lines in a Ring" last week. I started and ended the lesson with Jeanette Winter's, Henri's Scissors, a great little book about Matisse's collages.

I started by showing kids how to work with their desk partner to fold a piece of paper so that the corners remain together and the fold is even. One person holds the 2 matched corners and the other does a "finger walk" from the open end down to the fold and then creases right and left. (Sorry I didn't get a photo of this process -- it's easier than it sounds!!) Even with my warning and demonstrating AND emphasizing to start and end ON THE FOLD, we had a few who had to re-do!!!


 Then we used painted papers from the previous week to cut and position creative lines. Students worked on the back side, so the hardest thing to remember here was to put the dot of glue on the ends of the PAINTED side of the paper strips. They also put a dot of glue between the intersecting lines.


 The last step was to choose a color on which to mount their creation:))

 Looks like this batch chose yellow or blue backings -- I actually had lots of color choices available. 

It was fun to see how students attacked the arrangement of their lines. Some were symetrical all the way and others embraced asymetrical or totally random.

Saturday, March 7, 2015

Camouflage Collages

Back in January I wrote about this lesson (that I had originally planned to do with 5th graders focusing on color matching and composition). You can see it here. Well, I didn't get to try it with the older kids, so I plunged in with 2nd graders this past week, changing the focus a bit,  and I loved what happened!! They all created little abstract gems!!!

We started with a brief lesson on the Smartboard where students found the lines created where two colors meet and practiced extending those lines. We did a lesson last week where students extended lines out to the edges of their board, so this was easy.  I was using cut up pieces of food boxes (cause you know how I like to recycle!:)) Phyl, over at There's a Dragon in My Art Room, recently posted about artist Michael Albert, who makes his art from cereal boxes, too. So we looked at some of his work before starting our ideas. 

After extending their lines using Sharpie markers, students used watercolors to try to match the colors on the edges of their collaged box piece, and paint that color out to the edges also. They were trying to camouflage the collaged piece, much as animals use camouflage in nature to protect themselves. I taught children how to make tints with watercolors by adding more water to the pigment and mixing in their lids. They were working on a painting mat (just a piece of white cardstock) that they could use to test their mixed colors. I was absolutely delighted to hear kids talking about what colors they might use to mix the exact hue they were trying for.

Sometimes kids ended up with areas that weren't adjacent to the cereal box. I said they could either leave those areas white or choose any color that they thought looked good to paint them. That is why there is blue in part of this painting.
One little practical consideration -- once they were done painting, students had the final job of using a DRY paper towel (I actually cut them up into smaller rectangles so as not to waste paper) to vigorously and completely clean their paint lid so it is ready for the next artist to use.

Here are a few paintings drying on the patio:

It was so hard for me to choose just a few examples to share with you, so I'm posting more than I normally would. Hope you enjoy!!


 Once these were done and displayed, they provided great opportunities for discussion regarding SO MANY elements and principles of art!!!!!!