Tuesday, June 23, 2015

It Started With Foam Core

Once upon a time an art teacher had a bunch of left over foam core (yes, that would be me:)). What to do with it?? How about some simple sculptures with a little design thrown in. That is how this all started. All well and fine, but I didn't like it and decided not to use it with kids. That seems to happen a lot when I'm trying to design lessons that will teach something of substance. So I set it aside.


One night I was looking over at it and noticed the shadows created by the raised edges and decided to do a quick sketch.


That made me think of when little kids draw things like tables they often draw the 2 front legs vertically and the back 2 legs protruding out diagonally (instead of leaving them out altogether or just drawing the part they can actually see). I'm not talking about an intentionally abstract rendition, but when kids are trying to represent something realistically and then get frustrated when their drawing doesn't "look real" to them or match what they see. Here we are at the crux of the matter -- what are you really seeing vs. what you think you see. I think little exercises in seeing are FUN and sometimes produce little exploratory gems.

So, curious about how washable watercolor marker shadows would look, using a black Crayola marker, I drew some shadows.


Then, I painted the marker lightly with plain water. (Now, this I like!!)


That was pretty fun!! But, it got me thinking about Holton Rower's drip paintings on plywood art. They truly fascinate me!! 

If you haven't seen this video of the process, it is a good one to check out (HERE).

Anyway, that got me experimenting drawing boxes with dripping paint. Hmm. Drawing the paint dripping is harder than it looks. This would really get kids to focus on changing line direction as the paint moves from a horizontal plane to a vertical drop!!!

This could tie into a Geometry unit. 
A little shading might be a good idea, too.

I think this would be fun to do with older kids.

The final question that came to mind was, "What would it look like to draw a tower looking at it from above?" Instead of using regular blocks, I tried it with organic shapes, using the same watercolor marker and water brushstrokes technique to create the shadows.


Younger students could have a blast with this!!

And just think, all this started with a bunch of left over foam core (which, it seems, I still haven't figured out what to do with)!!!

Hope everyone is enjoying a relaxing summer!

Thursday, June 4, 2015

Art and Math Everywhere!!!

Two weeks ago, when kindergarteners started creating their buildings for a collaborative EXTRAVAGANZA to be revealed in August when school starts up again, I thought the focus was going to be the use of Color, at least that's what my lesson plan indicated.


Well, I was only half right -- read on . . .

I started with a Smartboard presentation on "crooked and colorful buildings in the world" with a focus on the art of James Rizzi and the architecture of our local star, Frank Gehry. In 1978, Gehry remodeled his family home experimenting with some building materials that were pretty unusual at the time. He, of course, has gone on to design some spectacular buildings that seem to soar into the space around them with anything but perpendicular walls! Since his house is walking distance from our school, it seemed that a look at some of his buildings around the world would be a good place to start our classroom discussion.


Then our art began. Kindergarteners spent Day One painting buildings a variety of colors using cake tempera. First, I modeled how to paint using the broad side of the brush to get fatter lines AND how to paint all in one direction.


Then we switched to liquid tempera to paint the windows. I demonstrated how you can let the brush do the work of painting the squares and rectangles by just pressing and painting a short stroke. Students also tried to paint their windows in straight rows to indicate floors in a building.


 We let these buildings dry.

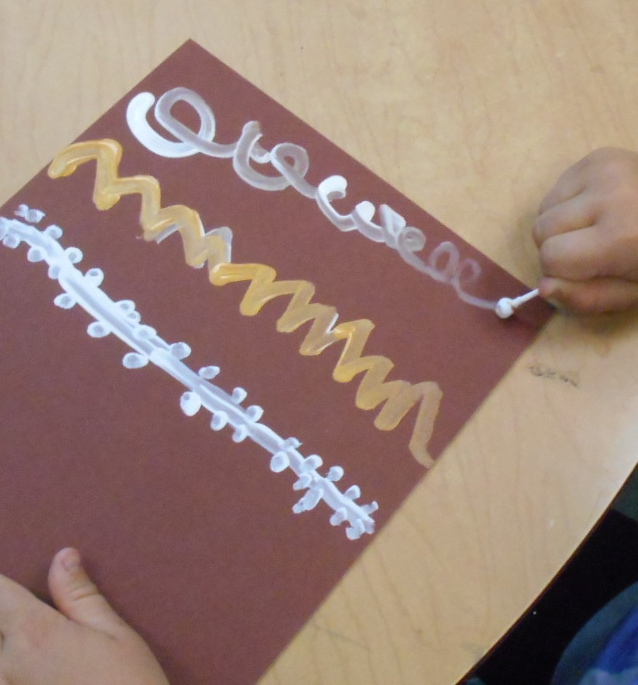
On Day 2, using white and GOLD tempera and Q-tips instead of brushes, kids made a background using line designs that we had learned about three weeks before.


While the paint was drying a bit, kids outlined their windows and doors with a Sharpie. And this is where the MATH popped up and took over. One little boy started counting his windows as I walked by. I stopped to watch and talk to him about this (he had 24) and the rest of the table got wind of what was going on and started counting. Well, pretty soon everybody was counting.


It would have been fun, time permitting, to have figured out how many windows there were in all, but since time was running out, I posed the question, "Do you think we have more or less than 100 windows in all?" That led to some pretty interesting responses!!


As I said, I am saving all of these "crooked creations" for a giant crooked city display in the Auditorium for when school starts in August. Be sure to check back for the big reveal!! AND . . . have a glorious and rejuvenating summer!!! 

By the way, I first did this lesson with 5th graders a number of years ago with a bit more emphasis on design details on buildings and use of complementary colors. You can find that lesson HERE.

Sunday, May 24, 2015

Flags for Country

It always amazes me that volunteers (including Boy Scouts and Girl Scouts) place each and every one of these little American flags at the 114 acre Los Angeles National Cemetery. They read each of the nearly 87,000 names (including my grandfather, who served in WWI) and offer a salute as they place the flags. The first internment here was May 11, 1889.


Enjoy your week-end --- it's almost summer:))

Thursday, May 14, 2015

Lots of Dots in Kindergarten

Here are some lovely little kindergarten paintings drying. They will soon be tucked away until their big August reveal!!

At the same time as this painting is going on,  I am also starting to box up supplies to get ready for the school's BIG summer cleaning. We have new protocols this year that call for packing up anything not stored in a closed cupboard. It will be nice to have everything really clean, but right now it feels like getting ready to move!!! That is a whole story unto itself!


Meanwhile, in planning for an art display in our Auditorium to kick off the 2015-16 school year, Kindergarteners are painting lots of dots:)) This is so we'll be ready to celebrate International Dot Day (Sept. 15th), based on Peter H. Reynolds' book, The Dot.

I have done lessons like this before with 4th graders (with a little more color wheel art content included). You can check that out HERE. I originally found out about Dot Day from Hope Hunter Knight's blog back in 2012  -- thank you, Hope!!. You can find a link to her dot lesson through the above link. 


This week I started talking a bit with kindergarteners about the book and how Vashti started by just making a mark and then her art grew and grew.

We took a look at some different kinds of lines that markers can make and gave the lines names. Some of the kids' names were:
        "Curly-Q"
        " Wavy"
        "Mountain tops"
        "Train-tracks" . . .   You get the idea:)


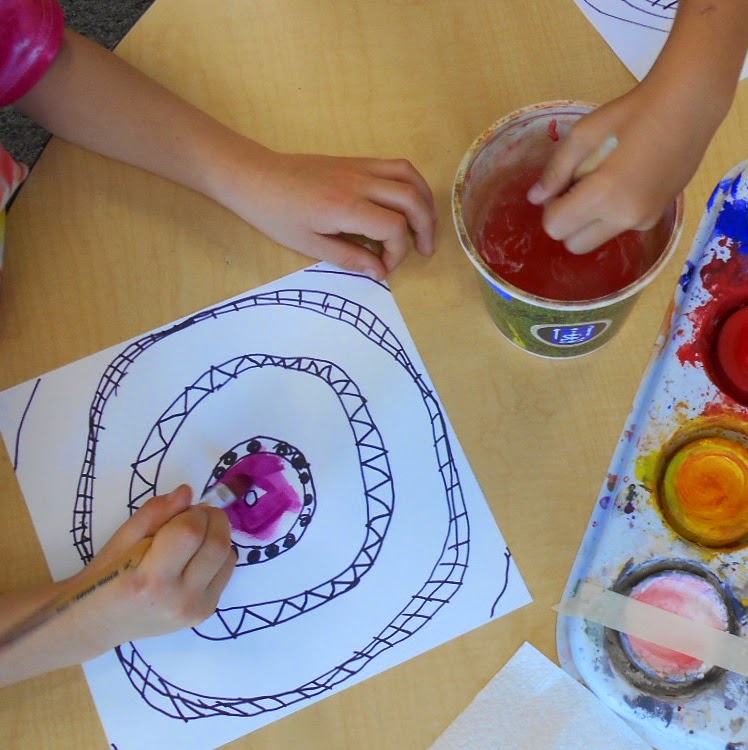
Using a black permanent Sharpie I demonstrated how to make concentric circles, one a "skinny pathway" and the next a larger space for painting. Students followed along.

Then they either used line patterns from our chart or made up their own lines to fill their "skinny pathways."

I had them come back to the rug to talk about using "Mr. Brush" so that our brushes would last a long time. I share with them that I have one set of watercolor brushes that have been used at our school for over 50 years -- TRUE STORY!!


I showed them how to clean their brushes between changing colors and test to see if they are clean by running the brush along the top of their hand to see if the water is clear.


Then it was back to their table to paint all the large circles between the black and white pathways.


Love the asymmetry of the middle piece!!

The girl on the left spent a lot of time mixing the colors in the lower left part of her work using her finger.

This little guy didn't quite get the idea of leaving alternate areas blank for the paint and filled them all with patterns. He was so intent on what he was doing I didn't have the heart to stop him!!

Of course, you'll have to check back in August to see all our dots displayed. By then all these boxes I am packing now will be unpacked and we'll all be ready for a brand new school year!!

Friday, May 8, 2015

Kindergarteners and Kandinsky

Earlier this year our Kindergarteners made their own renditions of Kandinsky's Squares and Concentric Circles -- you know, the one we all try with kids sooner or later. Well, this week we are taking a look at another Kandinsky work, Circles in a Circle. Here are a few of ours drying in the sun.

And here is a sort of grainy shot of the Kandinsky from the Smartboard. Sorry for the quality of my picture:(
We talked about how many circles we saw, how many lines, size and colors of circles, directions of lines, etc.

Then the fun began. I had prepared part of the large circle with a crayon line for kids to cut to finish it up. I wanted them to practice cutting, but, from experience,  I knew doing the whole drawing and cutting on the fold thing might be too much for the time we had allotted.  They glued their circle on their boards (9" X 12" illustration board - but paper would be fine, too).


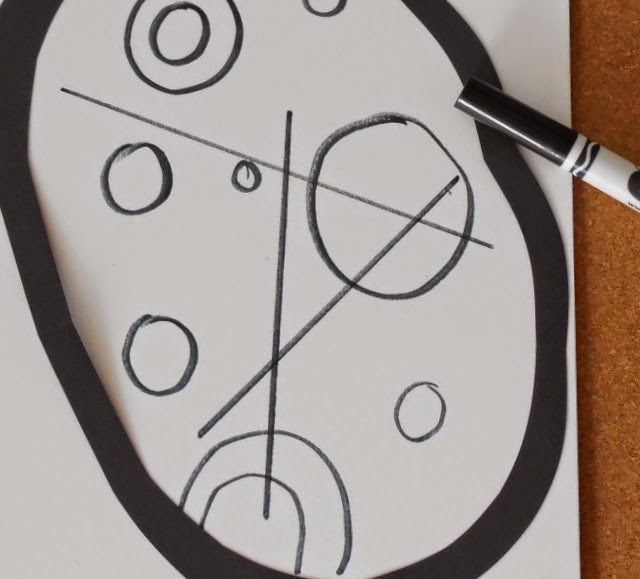
I know, this isn't a circle. It was my first sample and it's an oval -- that works, too!!


To decide how many circles to draw inside, we rolled dice at each work table (and drew that many with washable markers - I like Crayola brand markers for this) -- some large, some small, some within other circles - all drawn freehand. I heard LOTS of counting and comparing going on during this part of the lesson!! Using primary colored crayons, kids colored a few circles. Then they drew some straight lines - also with washable marker.


Finally, out came the paint brushes and students gently painted plain water over their marker lines to blur them and get a "painterly" look.


So, what skills did these little ones practice: cutting, gluing (a dot is a lot), drawing (shape, line), color choice and placement (balance, repetition), using a straight edge, use of a paintbrush (we still have a ways to go before we get that all right!!).

Sunday, April 26, 2015

Spring Fingerprint Snapdragons

Tints and Shades
Last week our 1st graders created half of their mixed media still life paintings. You can see how they made their vases, table tops and backgrounds here. This week, after discussing how you can see where the sunlight hits part of the blossoms, we broke out the liquid tempera and children got busy with their index fingers.
  I shared Lois Ehlert's, Feathers for Lunch, and we searched for examples of where she used tints in her flowers.
You may notice that I put the white on a separate, disposable plate, as some tables got their paint pretty messed up by the end of the hour.
 I demonstrated how to use JUST ONE FINGER to make the snapdragon blossoms. Children had 5 "color wheel" colors plus white. They dipped into the color first and then into the white before printing. We call this "double dip painting". They started printing at the bottom of each stem and went to its left, then right, left, right, etc. until reaching the top where the blossoms taper off. They went back and added prints or more white (for highlights) as needed. I had newspaper spread under their work, so before switching colors, kids just wiped their finger on it so that their finger was ready to dip into a new color. (This really worked. The paint colors stayed perfectly "clean" all week long!!)
 Probably the hardest part for some was making sure that their stem extended down "into the vase", that is, to the bottom part of the oval depicting the vase's inside. Otherwise the flowers look like they are floating in air. We talked about this in each class.
 These spring blossoms definitely brighten up an otherwise rather bland hallway!!!!! I think we'll keep them there for awhile!!:))


Friday, April 17, 2015

Spring Still Life - 1st Grade

This is the first week of a two-week project to welcome Spring. There are many great still life paintings out there on the web for children to examine and talk about -- take your pick and show them your favorite artists to kick things off. I had a real vase positioned on a piece of fabric for kids to compare with a painting of a flower vase. I asked, "What did the artist do to make the vase look realistic?"


 Hands shot up and kids saw everything I was hoping they would see!! Comments were: "The artist made a "circle" at the top of the vase (not everyone remembered the word "oval" so I wrote that word on the board), "The vase has a light side where the sunlight is hitting it", "There's dark shading on the shadow side", "The bottom of the vase is curved like the oval", and my favorite, "The table looks like it goes behind the vase so it looks like you can just walk up and pick up the vase with your hand."  Are these children observant or what!!!??!!

Then, using oil pastels, I did a directed lesson to get them started with the vase. (Start with drawing an oval in the center of the board. Add sides and bottom and color in everything BUT the oval. Make a vertical black strip on one side, and a matching white strip on the other side. Blend all layers together with curved, horizontal strokes, using the original color of pastel. (You can find a similar lesson with details and photos HERE.)The hardest part for little ones is to get that horizontal direction of their pastels as they blend the black, color and white together smoothly. I do a lot of walking around and assisting during that portion of the lesson. 

Next, they added a simple plaid, fabric table cloth using whatever colors they liked. ( I modeled how to do this, too.)

A few stems were added to get ready for the flowers that they will add with paint next week.
 The last step was to add 2 colors of chalk/pastels and smear it with their fingers for the subtle background.

Stay tuned for vases full of snapdragons next week:))