I recently discovered local Pasadena artist, Steve Roden when Christopher Knight of the L.A. Times reviewed the 20 year survey of his work at the Pasadena Armory Center for the Arts. I took my mother with me to see the show just before it closed earlier this month.
I am not sure I fully understand how Roden plans his art, but from what I gather, he starts with a system or structure. For example he might focus on the notes in a musical score or a line from a poem. He then assigns a structure of colors, shapes, lines, sizes, etc. to that score or poetry and uses this predetermined structure has he makes decisions in his artmaking (I think!!) Roden also produces sound and film using a similar process. According to Knight, 46 year old Roden has been compared to Arthur Dove, Paul Klee and Alfred Jensen. You can read more on the artist’s website and see many images of his paintings. Steve Roden ‘s webpage: Steve Roden's webpage Click on “images” when you get there.
Knight’s article is here: here
His paintings have a wonderful rhythm and repetition that kids can readily identify.
I’ve been thinking about an art lesson for 5th graders where they start with a structure, create their own compositions based on the structure and are able to articulate their thinking during and after the process. Roden’s work, as well as our previous work on Dale Chihuly, gives insight into an artist’s way of planning his or her artwork.
For our project I am having the students use the color wheel with a letter of the alphabet assigned to each color.
Before starting to create on paper, students will have the opportunity to "play" with moving squares on the Smartboard and talk about balance and composition.
I started with “A” in red and proceeded in order around the wheel. Students will have a choice of using the letters of their own name or our school's name. If I had more time with the class I would probably let them choose other words, too.
I think one of the fun parts of teaching art for me is getting to play around with the ideas first while I’m still in the planning stages. It helps me anticipate what students will be thinking as they work and what the pitfalls might be. I started by using the letters in my first name and the alphabet color wheel.
 |
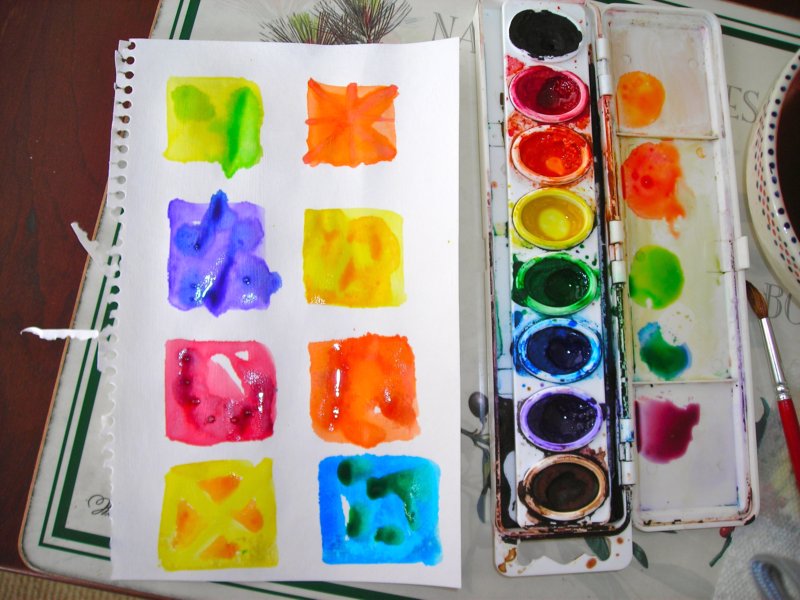
| The first letter in my name is "C", so my first square is yellow to match the "C" on my color wheel, etc. |
For each letter I painted (using watercolor) a square using the wheel as my guide. My plan was to later cut the squares out and compose a collage focusing on balance. However, as I worked, I didn’t like just the solid color squares, so after they had dried a bit I went back in and added touches of a neighboring color to each square (mixing each of these colors in the tray.)
Having the class do this will accomplish two purposes: practice using the tip of the watercolor brush (not squashing down all the bristles) and thinking about how to mix tertiary colors. Each little square felt like a mini-painting that I got involved in.
When the squares dry a bit, I'll have the kids cut them out and lay them out with like colors together so they can think about how they create color balance in their work.
In my practice work I tried arranging the squares first on black and then on a white board.
I opted for white so I could do something with color on the background. We’ll be gluing with Mod Podge applied with a sponge brush, so that’s what I used. As I worked I thought about the angle(s) I wanted to use and color placement on the overall piece. I also thought about possible overlapping. I want students to consider all these factors as they create their composition.
A final step was to help create unity by using crayons to frame each square – I used 2 complementary colors and then a black marker to give it some punch.
 |
| On this sample I used crumpled paper to print on the background and added texture to the painted squares with oil pastels to increase the brightness of the watercolors. |
There are so many options available with a project like this, including treating the background with color or texture before gluing if you have the time. I am anxious to see what the kids come up with!!
CA Standard - Create mixed media, 2 dimensional composition that reflects unity and harmony...


 This week 5th graders finished their experiment with composition using a color/alphabet system that we patterned after a process similar (we think) to one used by artist, Steve Roden (see earlier post here). We did it in one 50 minute session, but it was a rush. I would split it into 2 sessions next time. This turned out to be one of those projects where EVERYONE was successful!!