Tuesday, June 23, 2015

It Started With Foam Core

Once upon a time an art teacher had a bunch of left over foam core (yes, that would be me:)). What to do with it?? How about some simple sculptures with a little design thrown in. That is how this all started. All well and fine, but I didn't like it and decided not to use it with kids. That seems to happen a lot when I'm trying to design lessons that will teach something of substance. So I set it aside.


One night I was looking over at it and noticed the shadows created by the raised edges and decided to do a quick sketch.


That made me think of when little kids draw things like tables they often draw the 2 front legs vertically and the back 2 legs protruding out diagonally (instead of leaving them out altogether or just drawing the part they can actually see). I'm not talking about an intentionally abstract rendition, but when kids are trying to represent something realistically and then get frustrated when their drawing doesn't "look real" to them or match what they see. Here we are at the crux of the matter -- what are you really seeing vs. what you think you see. I think little exercises in seeing are FUN and sometimes produce little exploratory gems.

So, curious about how washable watercolor marker shadows would look, using a black Crayola marker, I drew some shadows.


Then, I painted the marker lightly with plain water. (Now, this I like!!)


That was pretty fun!! But, it got me thinking about Holton Rower's drip paintings on plywood art. They truly fascinate me!! 

If you haven't seen this video of the process, it is a good one to check out (HERE).

Anyway, that got me experimenting drawing boxes with dripping paint. Hmm. Drawing the paint dripping is harder than it looks. This would really get kids to focus on changing line direction as the paint moves from a horizontal plane to a vertical drop!!!

This could tie into a Geometry unit. 
A little shading might be a good idea, too.

I think this would be fun to do with older kids.

The final question that came to mind was, "What would it look like to draw a tower looking at it from above?" Instead of using regular blocks, I tried it with organic shapes, using the same watercolor marker and water brushstrokes technique to create the shadows.


Younger students could have a blast with this!!

And just think, all this started with a bunch of left over foam core (which, it seems, I still haven't figured out what to do with)!!!

Hope everyone is enjoying a relaxing summer!

Thursday, June 4, 2015

Art and Math Everywhere!!!

Two weeks ago, when kindergarteners started creating their buildings for a collaborative EXTRAVAGANZA to be revealed in August when school starts up again, I thought the focus was going to be the use of Color, at least that's what my lesson plan indicated.


Well, I was only half right -- read on . . .

I started with a Smartboard presentation on "crooked and colorful buildings in the world" with a focus on the art of James Rizzi and the architecture of our local star, Frank Gehry. In 1978, Gehry remodeled his family home experimenting with some building materials that were pretty unusual at the time. He, of course, has gone on to design some spectacular buildings that seem to soar into the space around them with anything but perpendicular walls! Since his house is walking distance from our school, it seemed that a look at some of his buildings around the world would be a good place to start our classroom discussion.


Then our art began. Kindergarteners spent Day One painting buildings a variety of colors using cake tempera. First, I modeled how to paint using the broad side of the brush to get fatter lines AND how to paint all in one direction.


Then we switched to liquid tempera to paint the windows. I demonstrated how you can let the brush do the work of painting the squares and rectangles by just pressing and painting a short stroke. Students also tried to paint their windows in straight rows to indicate floors in a building.


 We let these buildings dry.

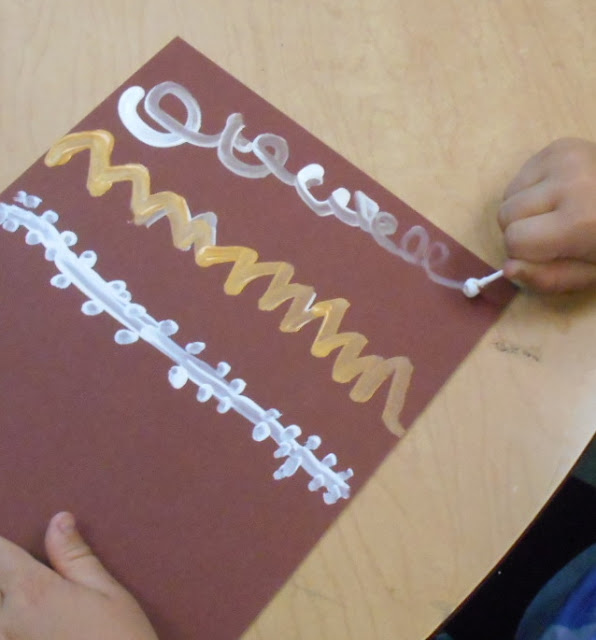
On Day 2, using white and GOLD tempera and Q-tips instead of brushes, kids made a background using line designs that we had learned about three weeks before.


While the paint was drying a bit, kids outlined their windows and doors with a Sharpie. And this is where the MATH popped up and took over. One little boy started counting his windows as I walked by. I stopped to watch and talk to him about this (he had 24) and the rest of the table got wind of what was going on and started counting. Well, pretty soon everybody was counting.


It would have been fun, time permitting, to have figured out how many windows there were in all, but since time was running out, I posed the question, "Do you think we have more or less than 100 windows in all?" That led to some pretty interesting responses!!


As I said, I am saving all of these "crooked creations" for a giant crooked city display in the Auditorium for when school starts in August. Be sure to check back for the big reveal!! AND . . . have a glorious and rejuvenating summer!!! 

By the way, I first did this lesson with 5th graders a number of years ago with a bit more emphasis on design details on buildings and use of complementary colors. You can find that lesson HERE.